 Ferndale
 Birch Bay's Shoreline Climate Puts Real Stress on Siding
Birch Bay sits right against the water, and that proximity changes what a house needs from its exterior. Homes just a few blocks inland in Ferndale deal with a milder version of the same weather, but along the bay itself, siding takes a steadier beating: salt-laden air moving off the water, wind-driven rain that hits walls at an angle instead of just falling straight down, and a long, damp shoulder season where moss and algae get a real foothold on north- and west-facing walls. None of this is unique to any one house — it's the baseline condition for anything built near this stretch of Whatcom County coastline.
The practical effect is that siding decisions homeowners can get away with in a drier, more sheltered part of the county show up as problems faster in Birch Bay. Paint fails sooner. Seams that were sealed but not truly waterproofed let moisture in behind the cladding. Wood-based products absorb ambient humidity even when they're never directly rained on. None of this means a house near the bay is doomed to siding trouble — it means the material and the installation both have to be matched to the actual exposure, not to a generic assumption about what "siding" needs to do.
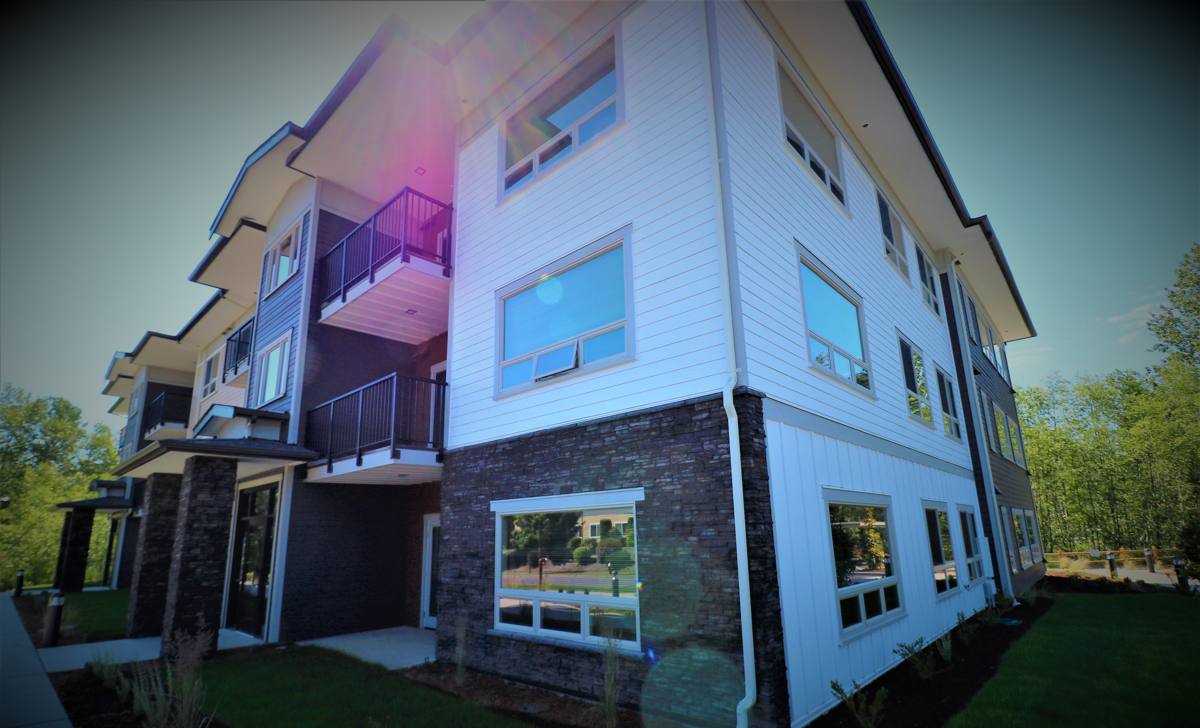
What Salt Air, Driving Rain, and Moss Actually Do to a Wall
Salt Air
Airborne salt doesn't just sit on a surface — it's hygroscopic, meaning it pulls moisture out of the air and holds it against whatever it lands on. On metal fasteners and trim accessories, that means accelerated corrosion if the wrong hardware was used. On painted wood or composite panels, salt residue combined with damp air keeps the surface wet longer than it would be otherwise, which is exactly the condition that breaks down paint film and lets water find any weak point in the material underneath.
Driving Rain
Rain that comes in sideways off the water doesn't behave like rain falling straight down. It gets pushed up under laps, into panel seams, and around window and door trim that would stay dry in a more sheltered location. That's why the flashing details and water-management layer behind the siding matter as much as the siding itself — a good product installed with sloppy flashing will still let water in, and a mediocre product installed with excellent flashing will still outperform expectations for a while, until the surface material itself gives out.
Moss and Algae
Western Washington's long wet season is moss-friendly everywhere, but shaded, north-facing walls near the water stay damp longer into the year than walls a mile or two inland. Moss and algae growth on siding isn't just cosmetic — organic growth holds moisture against the surface, and on materials that aren't dimensionally stable or properly sealed, that sustained dampness is what eventually leads to swelling, soft spots, or paint failure.
Why We Install Only James Hardie Fiber Cement
We don't install vinyl, LP SmartSide, primed spruce, cedar, or other fiber cement brands, and in a location like Birch Bay that decision matters more than it would somewhere drier and more sheltered. Fiber cement is cement, sand, and cellulose fiber — it doesn't feed mold or rot the way wood-based products can, and it holds its shape in a way vinyl doesn't when temperatures swing or when it takes direct sun after a soaking rain. We standardized on James Hardie specifically because their HZ5 product line is engineered for exactly this kind of moisture and temperature exposure, and because the factory-applied ColorPlus finish holds color and resists the fading and chalking that field-applied paint struggles with in salt air.
That's not a claim that every other product on the market is unusable — plenty of homes around the country wear vinyl or engineered wood siding without major issues. It's a statement of what we've decided we're willing to warranty and stand behind on homes exposed to this specific coastal climate. We'd rather install one product correctly and know exactly how it behaves over twenty years than offer five options and hope each one holds up.
How the Major Options Compare in This Exposure
| Material | Salt Air / Moisture Behavior | Moss & Algae Resistance | Typical Maintenance |
|---|---|---|---|
| James Hardie Fiber Cement | Non-combustible, dimensionally stable, engineered HZ5 line for wet climates | Factory finish resists organic growth better than field-painted surfaces | Occasional gentle wash; no repainting on a fixed schedule |
| Vinyl | Can warp or become brittle with temperature swings; seams are a water entry point | Moss grows on any dirty, damp surface, vinyl included | Low, but limited repair options if cracked or faded |
| LP SmartSide / Engineered Wood | Wood-based core is vulnerable if moisture reaches an unsealed edge or cut | More prone to sustained dampness issues if growth isn't cleared regularly | Repainting/recaulking on a maintenance schedule |
| Cedar / Primed Spruce | Natural wood absorbs humidity; needs consistent sealing to perform near water | Highest susceptibility without diligent upkeep | Regular refinishing and moss treatment |
What a Correct Installation Involves
The siding panel itself is only part of the job. In a location like Birch Bay, the water-management system behind and around the panels is what actually determines whether the house stays dry for the next few decades. A correct installation includes:
- A code-compliant weather-resistive barrier installed with proper overlaps, not just stapled up as an afterthought
- Flashing at every window, door, and roofline transition, integrated with the house wrap so water sheds outward rather than tracking behind the siding
- Proper starter strip and rainscreen gap where called for, so panels aren't sitting flush against a wall that can trap moisture
- Correct fastener type, spacing, and placement per James Hardie's installation specifications — this is where warranties are won or lost
- Caulking and sealant only where the manufacturer's instructions call for it, not as a substitute for proper flashing
- Trim and corner details sized and installed to shed water away from seams, especially on walls facing the prevailing wind and rain off the bay
Skipping or rushing any one of these steps is how a house ends up with hidden moisture damage years down the road, even though the siding itself looks fine from the street. This is also why we don't treat installation instructions as optional guidance — James Hardie's warranty is tied to installation meeting their spec, and cutting corners on flashing or fastening can void coverage even if the product itself never fails.
How Our Process Works for a Birch Bay Home
We start with an on-site walk of the exterior, looking specifically at exposure — which walls take the worst of the wind and rain off the water, where moss has already established itself, and whether there's any sign of existing moisture damage under the current siding. That assessment shapes decisions like where extra flashing attention is warranted and whether any sheathing needs repair before new siding goes on.
From there, we remove the old siding, inspect and repair the sheathing and framing underneath as needed, and install the weather-resistive barrier and flashing system before a single Hardie panel goes up. Panels, trim, and fasteners are installed to manufacturer spec, and we do a final walk-through with the homeowner to review the finished work. Because we work exclusively with one product line, our crews aren't relearning installation details from job to job — the flashing details and fastening patterns that matter most in a bay-side exposure are second nature by the time we get to your house.
What Drives the Cost of a Birch Bay Siding Project
| Factor | Why It Matters Here |
|---|---|
| Extent of moisture damage under existing siding | Bay-side homes more often need sheathing repair before new siding can go on |
| Wall exposure and complexity | Walls facing prevailing wind and rain need more careful flashing, which adds labor |
| Trim and detail level | Corner boards, window trim, and accent details affect both material and labor cost |
| Home size and story height | Access and staging costs scale with square footage and building height |
| Existing siding removal | Tear-off and disposal of old material adds time compared to a bare-wall install |
We won't quote a number without seeing the house, but these are the variables that actually move a bid up or down — and they're also why two homes of similar size in Birch Bay can end up with noticeably different project costs.
Signs a Birch Bay Home May Need New Siding Soon
- Moss or algae that returns quickly after cleaning, especially on north- or west-facing walls
- Paint that's chalking, peeling, or fading faster than it used to
- Soft spots, bubbling, or visible warping anywhere on the siding surface
- Gaps opening up at seams, corners, or trim that weren't there a few years ago
- A musty smell or visible staining on interior walls that share an exterior wall with heavy weather exposure
- Siding that's simply reached the end of its expected service life for its material type
Why Local Experience in Birch Bay Matters
A crew that's worked other homes along this stretch of the bay already knows which walls tend to take the worst weather, how moss behaves on local roof and siding lines through the wet months, and what flashing details hold up over time in this specific exposure versus a more sheltered inland lot. That's not something you can fully substitute with a general siding background — it's built up by seeing how houses in this exact microclimate actually perform after a few winters. It also means fewer surprises during the estimate: we're not guessing at what Birch Bay's weather does to a wall, we've seen it.
If you're considering new siding for a home in or near Birch Bay, we're happy to take a look and walk you through what we'd recommend and why — no pressure, no obligation. Reach out using the form below to schedule a free estimate.